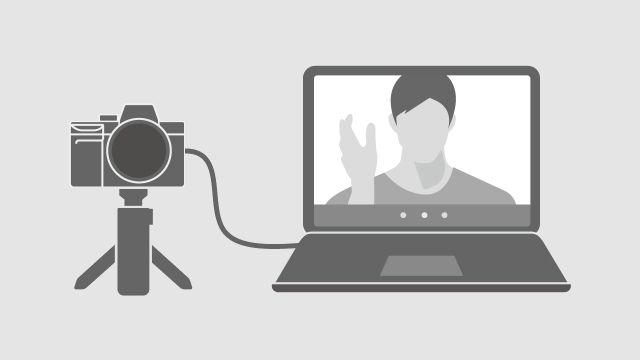
You might be in need of video chatting or livestreaming but you have no access to a webcam which would have worked excellently. This actually should not stop you from proceeding with your tasks yet you have a digital camera with you.
This device works in a professional way to resolve the absence of a webcam. It has all the potentials to serve you so long as you follow the instructions below for setting up.
However, you should have with you things like the USB cable, lens, HDMI cable, microphone, tripod or stand, extra battery, source of light, and AC adapter. For most cases, it is always advisable that you test your webcam by simply going to devicetests.com.
PROCEDURE FOR SETTING UP A DIGITAL CAMERA AS A WEBCAM
INSTALL THE CAPTURE DEVICE.
Use the available USB cable to connect the digital camera with the computer. It is always advisable to go for the fastest cable for instance if you have the USB 3.0 and the USB 2.0, it is no doubt to go for the USB 3.0.
This first procedure is only applicable for devices that are USB compatible.
For cases of internal capture card devices, you begin by opening your computer after which you will need to select the effective PCle slot that supports your card.
However, the selection might be hard and you are advised to obtain a hint from the motherboard’s manual. In case the available slots fail to support your card, don’t hesitate to install it in a longer one which will also work.
ENSURE THAT YOUR CAMERA IS READY FOR THE TASK.
The most essential thing that you should check with your camera is to ensure that it is fully charged.
This might not be enough to build trust that it will complete the operation and that’s why we suggest for an extra fully charged battery that will step in in case the first one dies off.
In case you are using a digital SLR, you should ensure that you have the correct lens with you. Not all lenses shall serve the best service so you need to have the correct one.
Once all these has been achieved, you proceed to turn on the camera. If you are using the digital SLR, you need to adjust its setting to movie or video mode.
CREATE A CONNECTION BETWEEN YOUR CAMERA AND THE CAPTURE DEVICE.
This procedure is done in two ways;
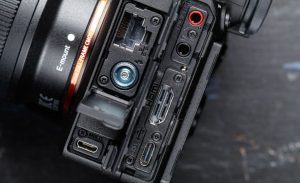
OPTION 1: Using the HDMI adapter, plug it to the camera through the micro or mini-HDMI port, then connect the adapter using a standard HDMI cable.
On the other part of the HDMI cable, plug it to the capture device.
OPTION 2: Connect your camera and the capture device using the specialty HDMI cable
INSTALL THE CAPTURE DEVICE SOFTWARE AND THEN OPEN IT.
Each capture device comes with its software so that it functions well. You need to download the software but if you are not aware of the procedures for downloading, you can visit the product’s company page and you will get the link that will guide you.
This software needs to be installed to the computer before proceeding. The next step is to open the software. A successfully installed software will display a note that it has picked up the video feed and will begin by showing your image.
ADJUST THE CAMERA’S SETTINGS.
There is plenty of information that the digital camera shall display which includes the shutter speed, color temperature, ISO, and many others. Similarly, in case a face appears on its front, it displays a focus box.
Ensure that these settings are adjusted to replicate those of a webcam.
These includes; settings on output so that it is at 720p or 1080p or even 4K. The output should also be at either 30 fps or 60fps but also 24 fps might work better. The focus box should also be turned off.
- USE A STAND TO HOLD YOUR CAMERA.
The stand should be placed on an eye-level position. This is to ensure that nothing interferes with the camera’s operation. In case you don’t have a stand, you can improvise on boxes to do the same.
CONCLUSION
Digital cameras can surprise you on the way they perform in place of webcam. Following just these simple procedures provides you with what you might not dare to purchase a webcam if you had planned.
Do not be left behind, try it today and be assured it works.


