It’s easy to fill your Photos app with different photo albums. It could be something that you made years ago but forgot about or the app has been created specifically for you. Here’s how you can delete photo albums on iPhone, iPad, and Mac.
Remove Photo Albums from iPhone as well as iPad
The Photos app for iPhone and iPad allows you to create, organize, and remove albums. You can also remove multiple albums simultaneously from the album editing screen.
If you remove a photo album, it won’t erase the photos in the album. The photos will remain on the Recents album as well as in other albums.
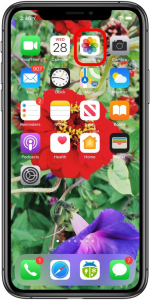
To begin the process, you must start by opening the “Photos” program on the iPhone or iPad and then click”Albums” in the “Albums” Tab.
How to Delete Albums on iPhone and iPad
If you create an album of pictures using your Photos apps on your iPhone it is possible to delete this album off your iPhone.
The only iPhone photo albums you aren’t able to erase are Apple’s stock albums which include Favorites and People.
However, you can erase the Hidden photos album by removing all images from it.
- Start your Photo app.
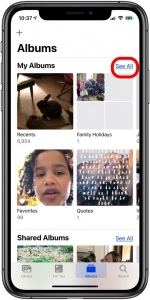
2. Click on the Albums button towards the lower right of the screen, and then press “Show All next on the screen to access My Albums.
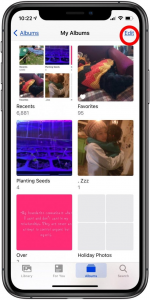
3. Press Edit in the upper-right edge of your screen.
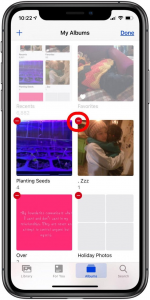
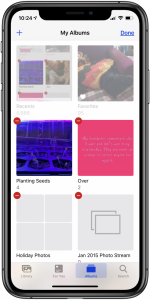
4. To remove an album of photos, tap the red circle in the corner of the album.
5. Confirm the deletion of the album.
6. Click Do it.
How to Delete Photo Albums on iPhone Tips
Remember that deleting albums of photos doesn’t remove the images contained within them. Additionally, there are albums that you cannot delete. Here’s the information you need to be aware of:
When you make a photo album and choose photos to place in it, you’re not taking those photos out of your primary Photos Library or copying a new photo into the album you’re putting it in.
If you “place” the photo into an album, what you’re doing is placing a graphic shortcut (an image of the photo) within the album. When you click on it, it will open the photo into the library that is which is where the actual image is always present.
The reason for this is that when you delete a picture in an album it’s not erased from your phone.
This means that, if you decide to delete the entire album of photos, you’re not actually taking away the photos by themselves. It’s just removing their organizational structure (the albums). The original images will be inside Your Photos Library.
Be aware that there are certain albums you are not able to erase. They are default ones, such as Recents, Selfies, Screenshots, and more.
Did you get all that? Good! It’s now time to begin getting rid of your photos from albums.
How to Delete Albums on iPad
It’s good to know that the process of deleting the photo album using an iPhone can be a breeze. We’ll guide you through it now:
- Open the Photo app on your phone to start it.
- Click the Albums tab near the lower right on the display.
- Click on the “See All” button. This will bring you to your “My Albums” screen. The screen will show you every photo album that you’ve made.
- Press on the “Edit” option. There will be an orange dot with a minus symbol that appears at the top left of any picture album that you are able to delete.
- Browse through your photo albums. When you see something that you want to erase, click the red dot that has the menu icon.
A message will appear that reads, “Delete [album name].”
The message will continue to read, “Are you sure you would like to delete the album named after the album?
The photos won’t disappear.” If you’d like to keep deleting this album, press the “Delete Album” in the red “Delete Album” button.
That’s it! You’ve just deleted a photo album from your iPhone!
You can delete other albums using the steps above, or you can press”Done” to exit the delete mode “Done” button and end the mode of deleting albums.


